Level up your PV modeling. Check out our library of on-demand webinars. Watch now →
✕

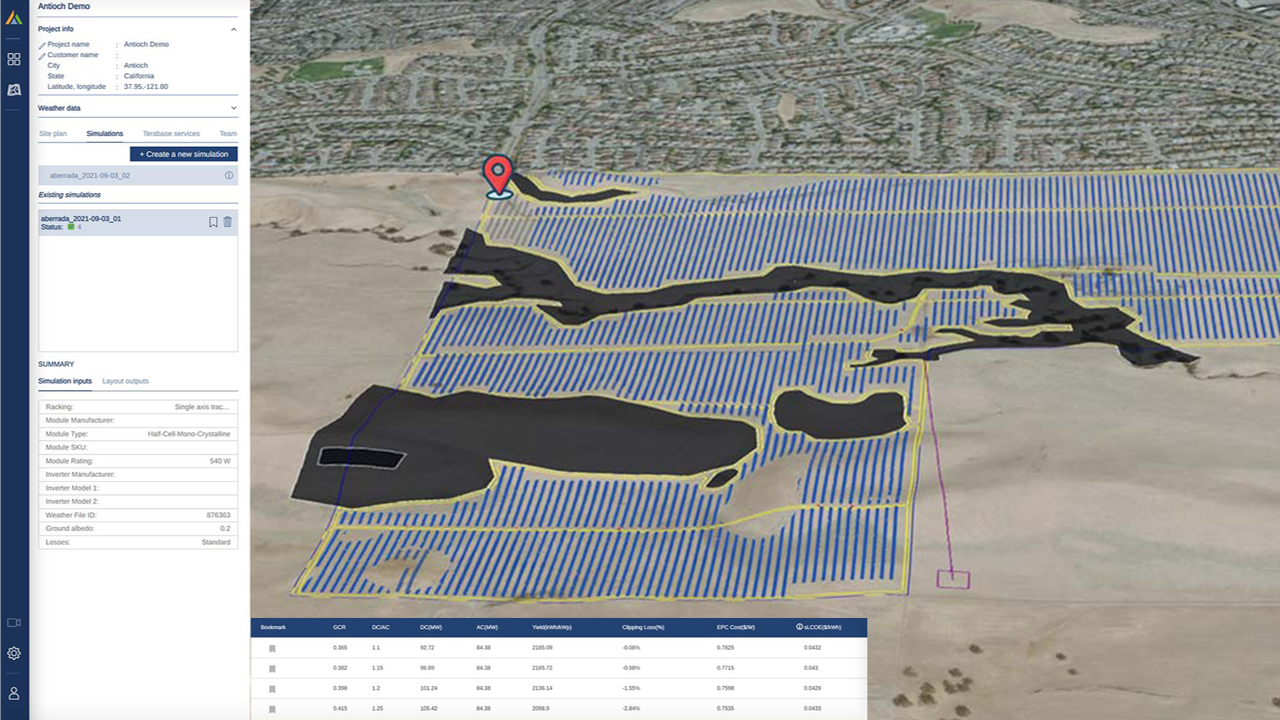
Utility-Scale Solar development has never been more competitive, which means that every design decision counts. If you're an engineer or a project developer, you know the pressure: clients want maximum performance, timelines are tight, and there's no room for guesswork. That's where PlantPredict's Design Pro comes in handy.
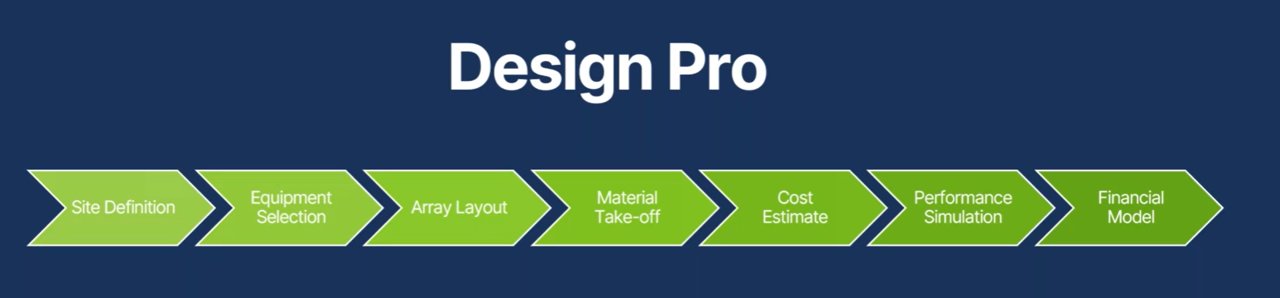
Whether you're comparing 50 different design scenarios at once, optimizing system parameters like GCR and DC/AC ratio, or selecting bankable components directly from a trusted library — Design Pro does it all. In this blog, we'll take a closer look at some of Design Pro's most powerful features, showcasing how it speeds up decision-making and enhances accuracy at every stage of utility-scale solar system design.
Design Pro's Batch Clone Simulations feature is built for users who need to test dozens of design variations quickly. With just a few inputs, users can generate up to 50 different simulation scenarios from a single base case, each with modified values for GCR (Ground Coverage Ratio), row spacing, DC capacity, DC/AC ratio, AC capacity, and number of inverters.
This feature allows you to efficiently map how changes in design inputs affect Energy Yield, Clipping Losses, Grading, EPC Cost, LCOE, and Land Use Percent — without having to build each case manually. By batch-running these variations, teams can quickly visualize trends, identify the most cost-effective design, and eliminate time-consuming guesswork.
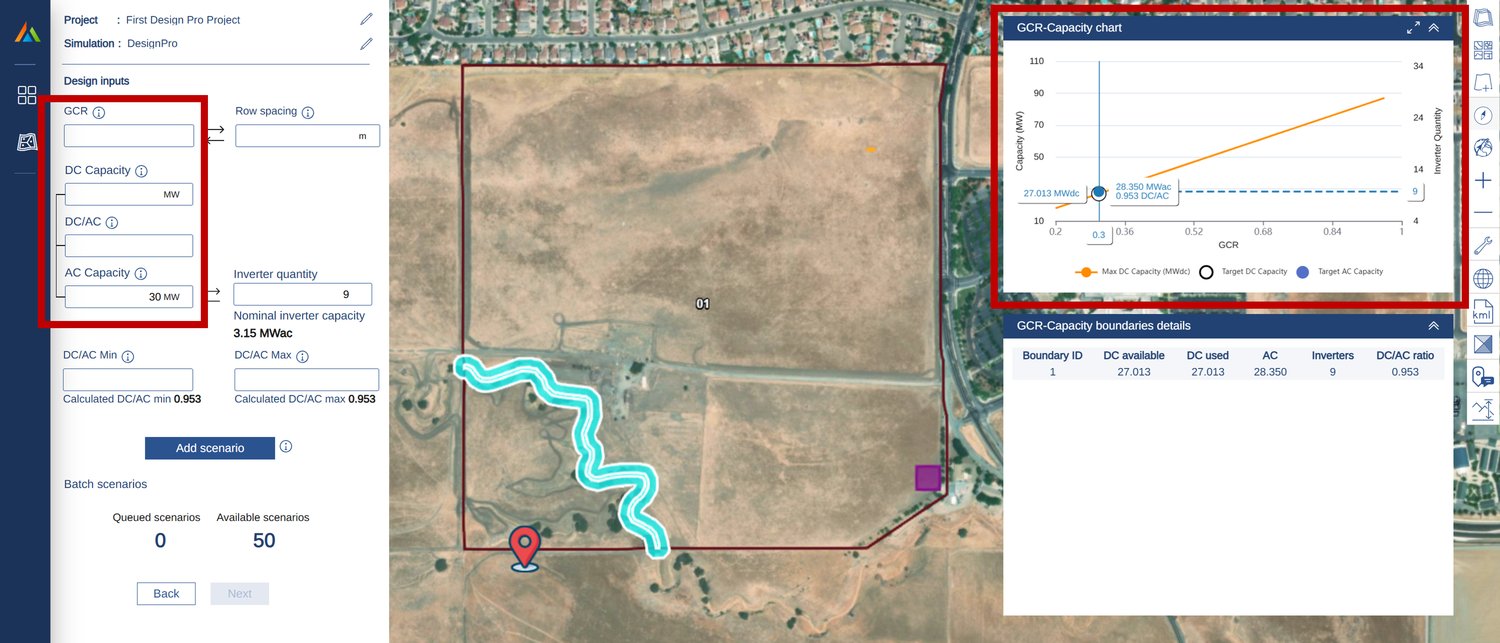
The GCR-Capacity Chart is a dual y-axis chart, with GCR in the X-Axis, Capacity (MW) in the primary Y-Axis, and Inverter Quantity in the secondary Y-Axis. Additionally, it has a linear Max DC Capacity (MWdc) line, which helps determine the target DC capacity, target AC capacity, DC/AC Ratio and Inverter Quantity for a simulation.
In the chart below, we have provided a GCR of 0.4 for the simulation. This corresponds to Target DC Capacity of 35.890 MWdc, Target AC Capacity of 31.500 MWac, DC/AC Ratio of 1.139, and Inverter Quantity of 10.

Component selection is a crucial step in any solar design, and Design Pro makes it easier by offering a module and inverter library preloaded with bankable, verified data from manufacturers. This means you can confidently select from real-world panels and inverters.
Design Pro's library includes PV modules from 10 different manufacturers and inverters from 23 different manufacturers. Each PV Module includes detailed specifications like Module Power, Module Width, Module Height, Temperature Coefficients, Module Voc, Efficiency, etc. Each inverter's specifications include Model, Nominal Power, Min. Voltage, Output Voltage, etc.
If you cannot find the module or inverter you are looking for in the Design Pro library, you can create a custom PV Module or Inverter in PlantPredict, and it will be added to Design Pro's library.

In this section, I will guide you through a workflow for generating a utility-scale solar layout in Design Pro. There are definitely other methods to achieve this, but I am providing a basic, must-know approach.
The simplest method to create a Boundary and Constraints KMZ file for your Utility-Scale Solar Plant is by using PlantPredict. You can learn how to set boundaries and constraints in PlantPredict by visiting our blog on Rapid Capacity Assessment and Site Screening. Link
After you are done setting the boundaries and constraints in PlantPredict, click the Download Data button on the top right corner, select the KMZ option, and click Export.
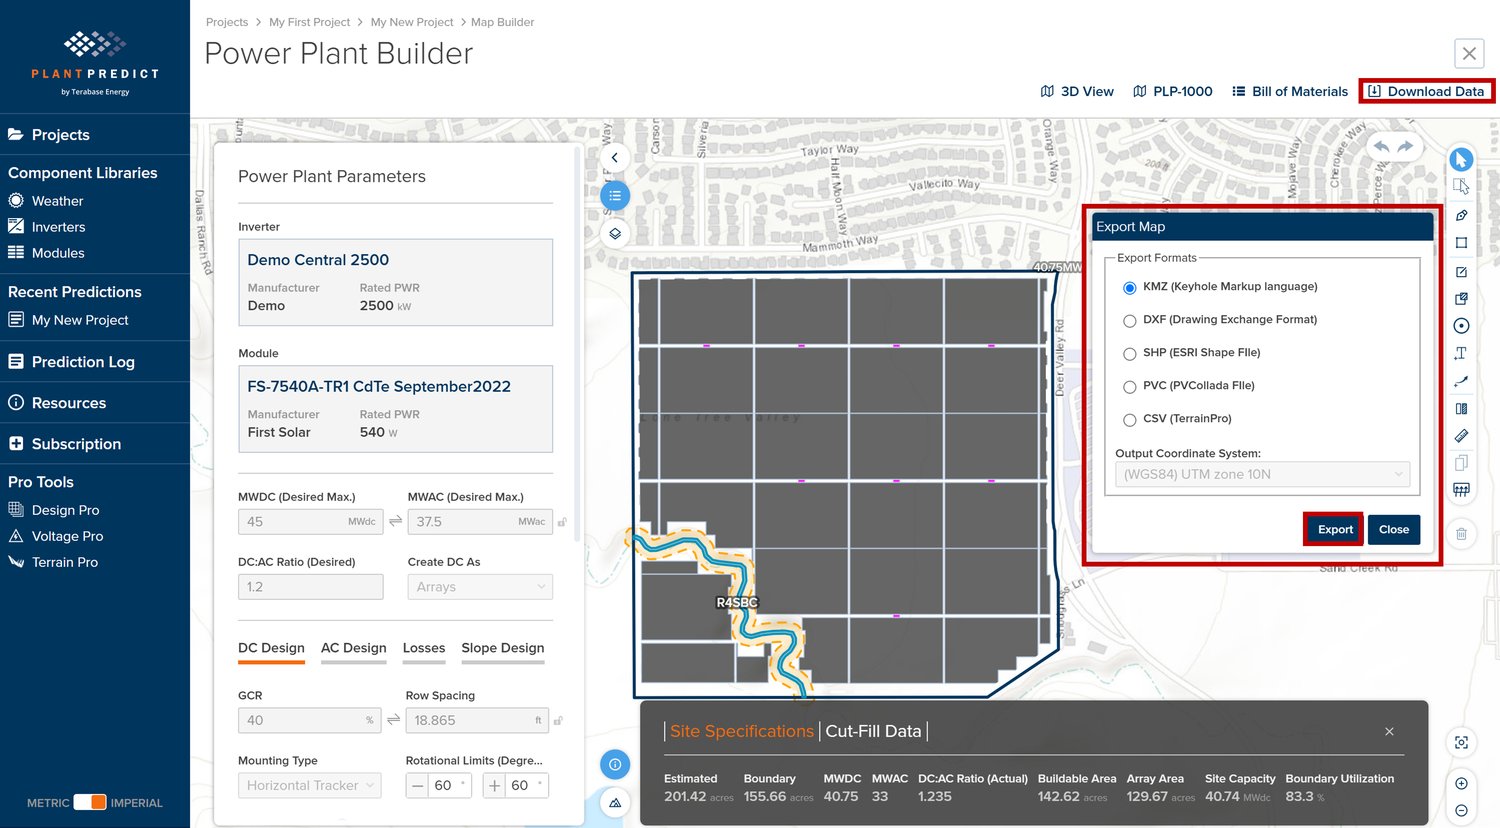
In this example, we are exporting an existing PlantPredict prediction along with the solar arrays. While solar arrays are not necessary, including them in the KMZ export will not cause any issues.
You can open Design Pro while in PlantPredict by clicking on the Design Pro option in the left-hand panel of the screen.
The Design Pro homepage will open up. You can create a new project by clicking on the Create new project button in the top-right corner of the screen.

Finish setting up the project in Design Pro by providing the Project Name and Customer name (optional). Upload the KML/KMZ file and then hit the Save button. You will notice that the Site Location and Weather data will automatically populate.

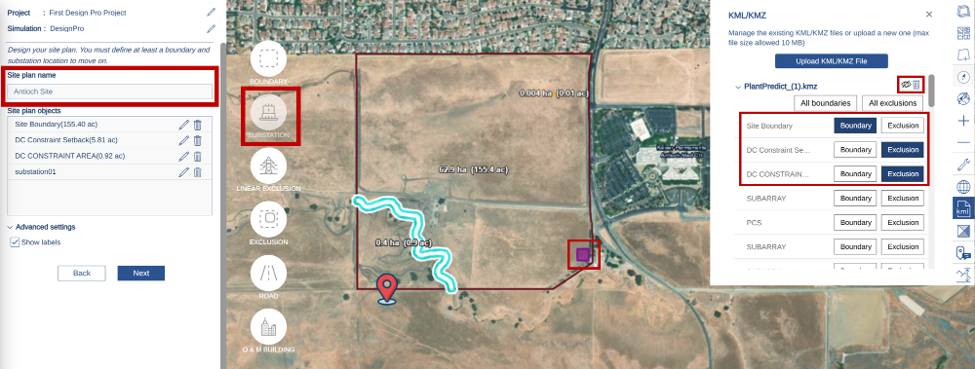
Now it's time to create the simulation. Click on the Create a new simulation button located on the left-hand side of your screen. Then, provide the Site plan name and the site boundary. Since we had uploaded the PlantPredict KMZ file, we will set the Site Boundary as Boundary and DC Constraint Area and DC Constraint Setback as Exclusion. Follow the steps below to set the Boundary and Exclusion:
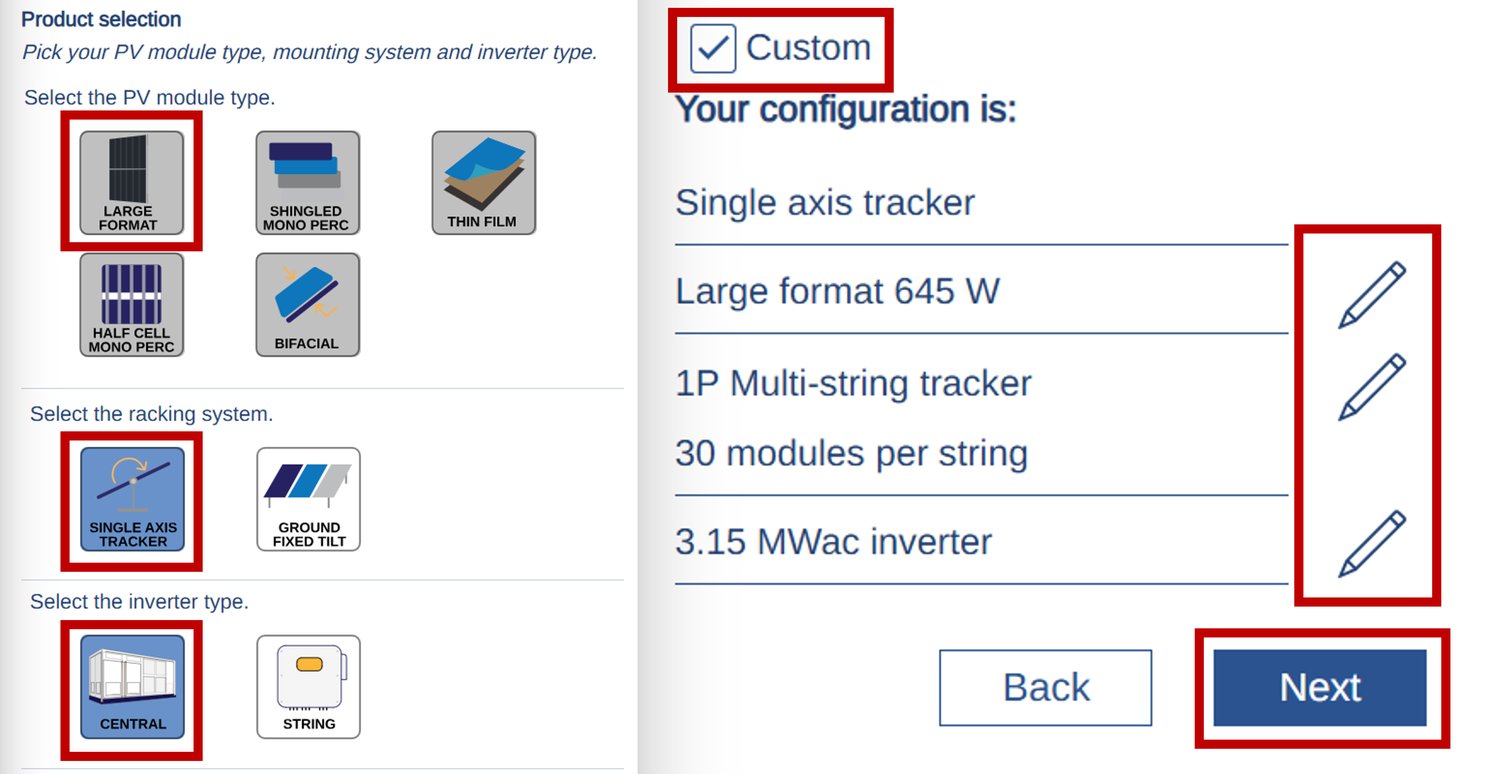
Now it's time to select the PV module type, mounting system, and inverter type. For the PV module type, we will choose Large Format (645W). For the racking system, we will select a Single Axis Tracker (1P Multi-string tracker, 30 modules per string). Lastly, for the inverter type, we will choose Central (3.15 MWac inverter).
If you wish to have a different product for any of the three categories mentioned above, you can check the Custom option and then click on the pencil icon to choose a different product from the PlantPredict library. Once done, click Next.
Now you can provide design inputs for your Utility-Scale Solar Project. You can input Ground Coverage Ratio (GCR), DC Capacity, DC/AC Ratio, and AC Capacity. You will notice that as you provide a value for one of the parameters, the GCR-Capacity Chart will update and provide you with the values of other parameters for your reference.
You can add up to 50 scenarios. For this case study, we will provide the following three scenarios:
Target GCR and Target DC will auto-populate. Don't forget to hit Next once you add all scenarios.

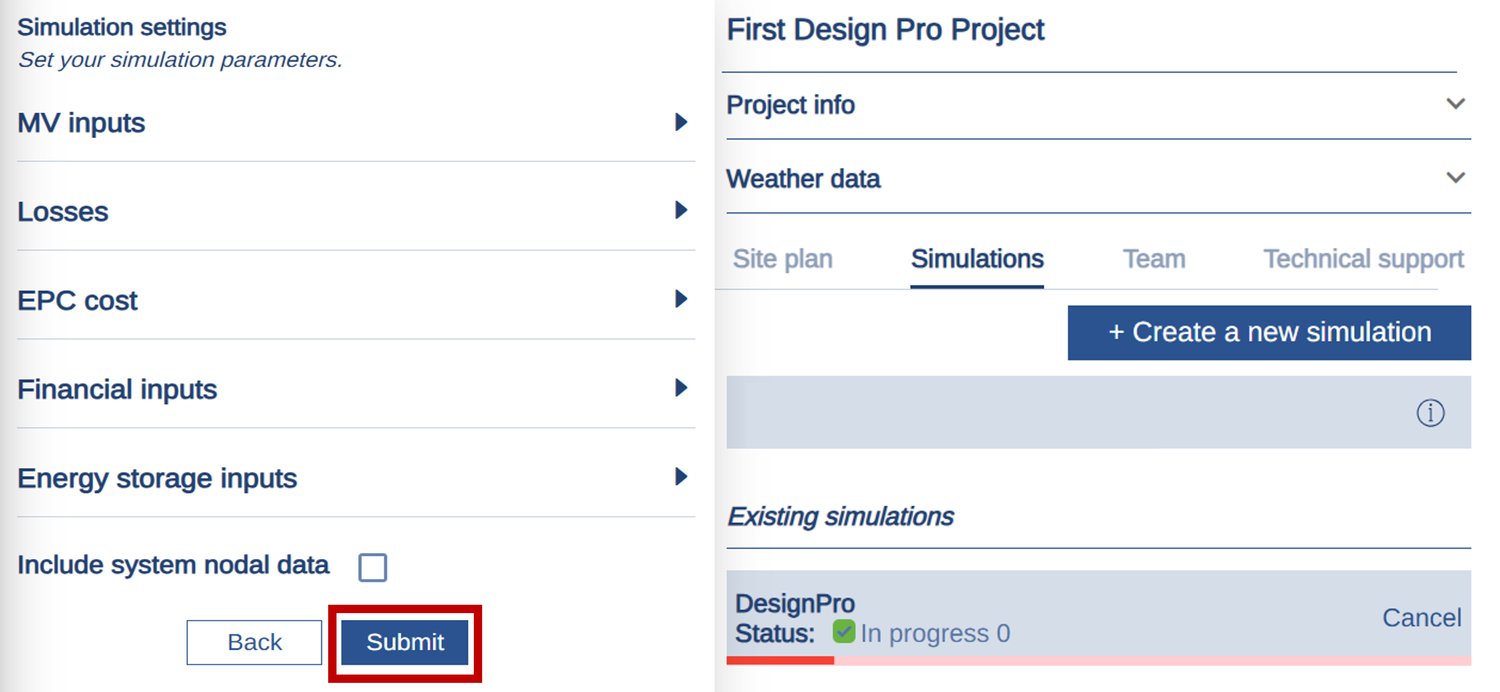
This is the last step for creating a utility-scale solar simulation in Design Pro. Here, you can set simulation parameters for MV inputs, Losses, EPC Cost, Financial Inputs, and Energy Storage Inputs. We will just go with the default values provided by Design Pro and hit Submit.
Design Pro will now process all the data provided to produce a Utility-Scale Solar Layout.
The Design Pro layout is ready for all three different scenarios. You can now view the GCR, DC/AC, DC (MW), AC (MW), Yield, Clipping Loss, Total Grading, EPC Cost, simple LCOE, and Land Use (%) for all three ratios. Design Pro also provides you with the option to download the Financial Report and KML, compare scenarios, link to PlantPredict prediction, and perform Terrain Analysis.

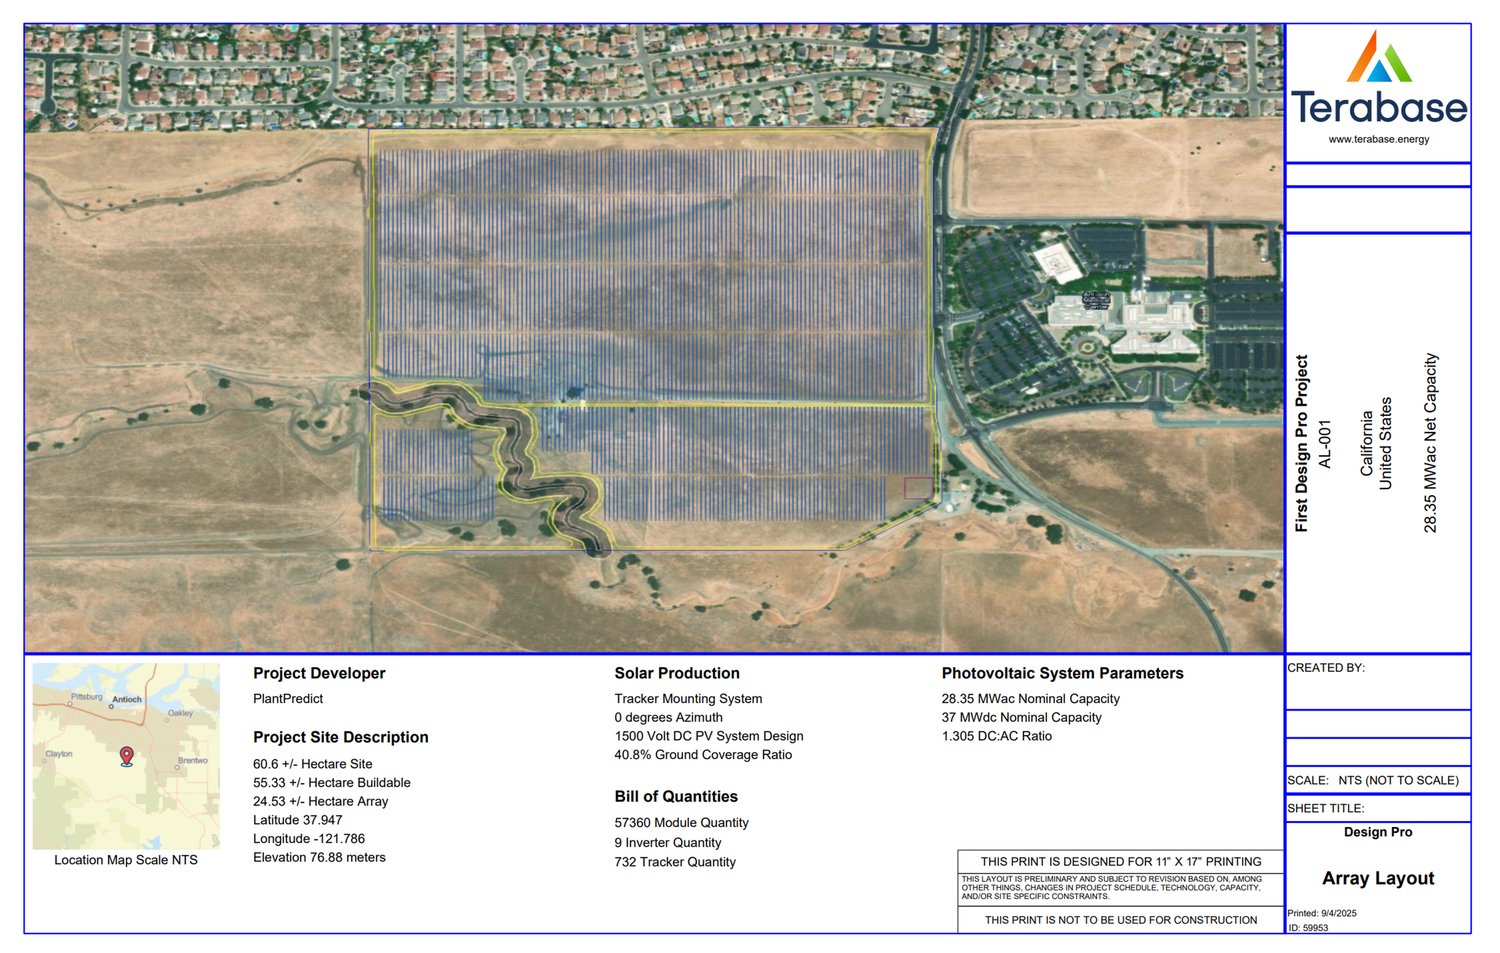
You can choose to render the solar panels as an array by clicking on the render button in the menu bar located on the right side of your screen. Additionally, you can download the array layout PDF by clicking on the PDF icon located below the render option. In addition to the array layout, the PDF will also have Project Site Description, Solar Production, Bill of Quantities, and PV System Parameters.
Design Pro is transforming the design process for utility-scale solar projects in 2025. It offers enhanced speed, precision, and flexibility at every stage of system modeling. With features like batch-cloning design scenarios and layout parameter optimization, it enables developers and engineers to make smarter and faster decisions. For teams aiming to excel in a fast-paced market, Design Pro is more than just a solar modeling tool — it's a competitive advantage. Get your trial today by visiting PlantPredict.com.
Join hundreds of organizations that trust PlantPredict for bankable energy predictions. Start with a free account, get a free trial of Pro features, or book a demo with our team.